Friday, November 13, 2009

Friday the 13th!

Are you scared?  Some people are very afraid of this day, in fact, the surgeon I work for does not do surgery for this very reason.  But where did it come from?  Why are people superstitious about this day?


According to some sources, Friday the 13th had never been mentioned in history until the 19th century.  Friday had become an unlucky day stemming from the Canterbury Tales in the 14th century regarding Friday as an unlucky day to start projects or begin a journey.  Friday is a day when the stock market crashes most often occur.  Jesus was also crucified on a Friday.  The number 13 has an even spookier history.  Many conspiracy theorist regard 13 as the mark the Freemasons left on our country's history.  Just take a walk with me....

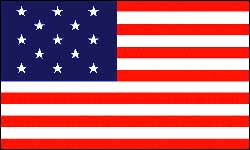
The original U.S. flag has 13 stars and 13 stripes.


There are 13 leaves on the olive branch and 13 berries. 13 stripes on the stripes on the middle shield. 13 arrows on the right. 13 stars above the eagles head. 13 letters in the "E Pluribus Unum" on the ribbon. 13 letters in "Annuit Coeptis". There are 13 blocks top to bottom on the pyramid.


Here are some events in history that happened with the number 13 or Friday:

- Apollo 13 was launched at 13:13 CST, and its oxygen tank ruptured on April 13, 1970.

- There were 13 people at the Last Supper, and Judas was the 13th person to arrive.

- Friday was Hangman’s Day in Britain.

- Some people say that Adam and Eve ate the forbidden fruit on a Friday, and that the Great Flood began on a Friday.

Just something to ponder on....what are your thoughts?

Read more...

Wednesday, November 11, 2009

Diaper Cake

This past weekend, my sister-in-law had a baby shower. She is due in early January. I can't help it, I'm a sucker for diaper cakes for baby showers. I just had to make one for her. Here's the recipe.

1 - 72 pack of size 2 diapers
1 - 2 pack of pacifiers
1 - set of comb and brush
1 - 6 pack of baby spoons
1 - nasal aspirator
1 - baby Orajel
3 - colors of curling ribbon
2 - colors of satin ribbon
1 - cardboard cake plate
1 - 1/4 inch dowel rod
1 - double sided tape
4 - sheets white tissue paper
1 - hot glue gun
1-1/2 yards of tulle
Lots of rubber bands

First, I rolled up the diapers from the waist end to the rump end. This way the edges would be smooth. I secured them with a rubber band. Continue 71 more times.....your fingers will become sore! Then I stood 8 of them on end and secured them together with a rubber band. One diaper will be in the center and 7 will be encircle the center diaper. This will be your top tier. Continue the previous steps to create another 8 diaper tier. This will become the center of our second tier. Around this tier, add 14 more diapers to encircle the 8 previous diapers with a rubber band. Continue this again and then add 19-21 more diapers around the tier and secure with a rubber band. This will be the bottom tier. You may need to add some extra diapers as needed to fill out the tiers.

Once you completed the tiers, take your cardboard cake plate and cover it with white tissue paper and secure with scotch tape on the bottom. Place a few strips of double sided tape on the top of the cake plate so the diapers will stick to the plate. Arrange the tiers so they form a cake. To secure the tiers together, cut the dowel rod the same height of the cake then place it thru the center of the cake from the top to the bottom. Now you cake is steady and secure on the plate.

Now it's time to decorate. Take your ribbons and secure them with a hot glue gun around the rubber bands (to hide them). My sister-in-law knew she was having a boy, so I found this cute blue ribbon. You may use whatever ribbon applies to your diaper cake. Then use curling ribbon to attach the rest of you goodies around the cake. Make sure to attach them at every angle of the cake so there aren't any bare spots.

Once you are finished decorating the cake, wrap it up with the tulle and voila! You have just make your diaper cake! Here are some more pictures of the one I created this weekend. Enjoy!


Read more...

Our First Auction Find

Soon after we moved in to our new home, we realized how expensive it was going to be to buy new furniture and things to decorate. We needed a plan, and fast! One of the benefits of our new home was a free weekly advertisement of local stores, services, auctions, and things for sale. We look forward to Tuesday every week when we come home to find this baby in our mail box. We scour the auction listings for the upcoming weekend. Most of the auctions we had gone to were horrible, nothing more than some hoarder collecting random things (Kim can attest to this!) Then, one Saturday afternoon, we headed to our weekly auction and found this beauty!


Doesn't it have a Ballard Design/Pottery Barn feel? I love it, I had to have it and for $110, it was ours! Just look at the details!


Now, this is my inspiration from Ballard Designs. I love the wainscoting, wide crown moulding and general coziness of the hutch.


My plan, for our first furniture makeover, is to use a chemical stripper on the hutch, then use my husband's handy-dandy paint sprayer to make a clean finish sans brush strokes. I have chosen Valspar's "Drumskin" for paint. It's a cozy cream color, and I can't wait to see what it looks like on the hutch! I haven't decided whether or not to distress the edges or just leave simple clean lines. What should I do?


Did you know that Target now sells hardware? Cute hardware? I found these drawer pulls and knobs to use for the hutch!
Target


This project will probably be completed this winter, as we are still settling in our new home. But I just wanted to give you a preview of our first project. I'll keep you posted when we start 'er up!


Read more...

Our New Blog

Good morning!

So, I've decided to jump on the blog bandwagon. I've followed several blogs for the last year, and with the generous help, and convincing from my friend Kim at NewlyWoodwards, I have started my own blog. I'll be sharing our own DIY projects, Goodwill finds, design style, auction finds and anything else that will be fun to share. I'm excited to meet new friends and share in the love of finding a good deal and designing a home. I look forward to blogging!

Read more...